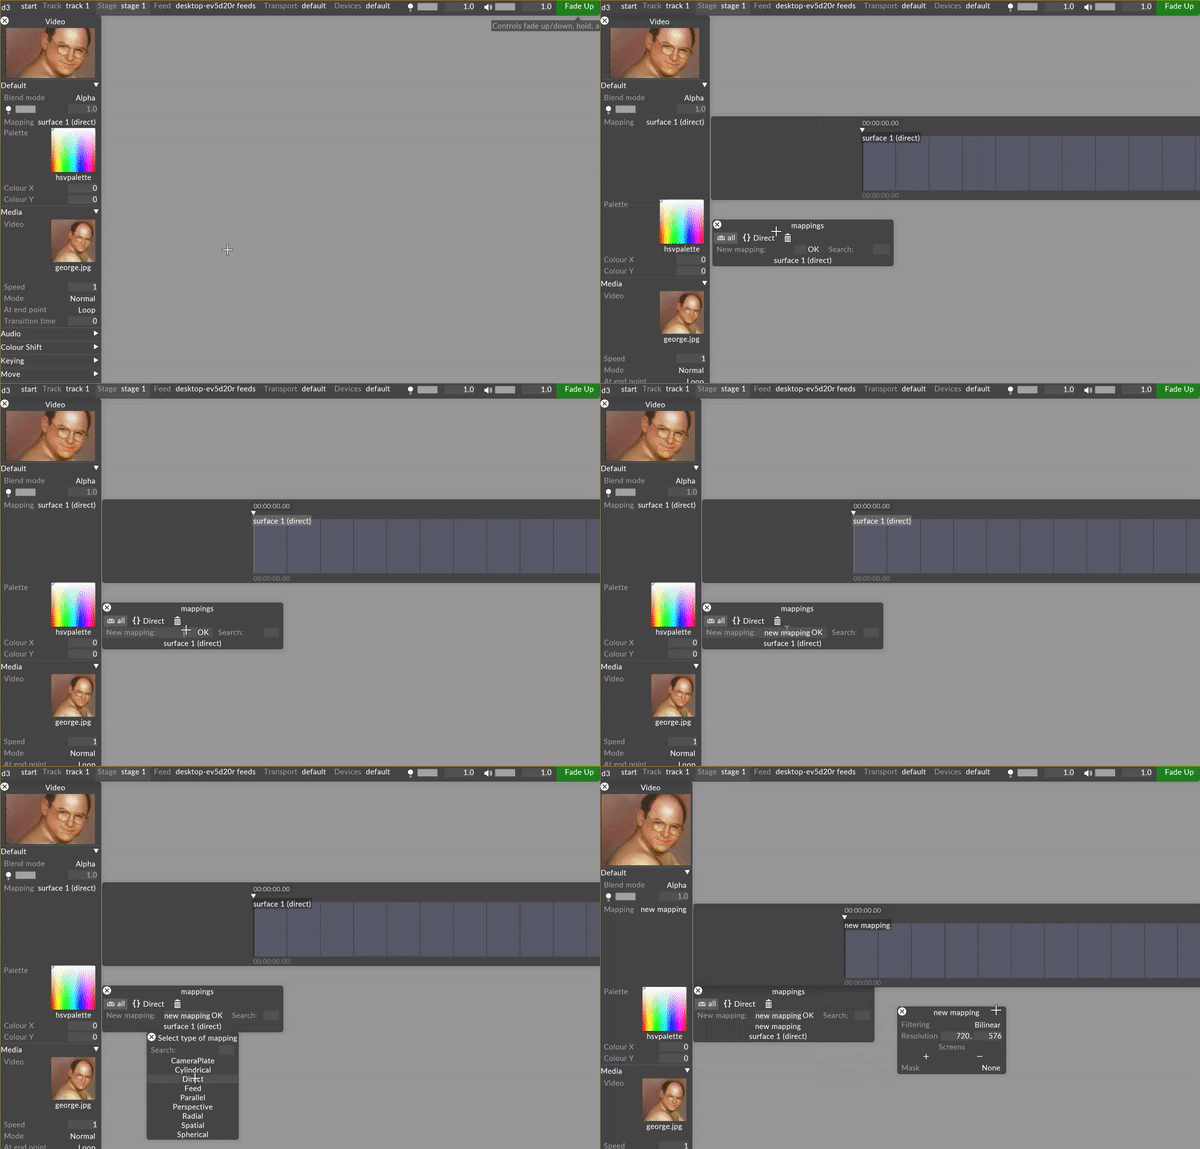
Creating a new mapping
-
In your track, create a new visual layer. These layer types can include content layers, generative layers, and effect layers.
-
Left click on the layer in the track to open the Layer Editor on the left side of the GUI.
-
Under the Default tab, left click on the Mapping parameter to display a list of the mappings in the project.
-
A manager titled mappings will appear – this is a list of all mappings within your project. By default, all screens will be populated with a direct mapping sharing the same name, and all cameras will be populated with a perspective mapping sharing the same name.
-
Type directly into the New mapping: text field to create a new mapping. A list will appear prompting to you select the mapping type.

-
An editor with the user assigned name of the mapping will appear once a mapping type is selected.
-
Assign all screens that will be used for the mapping and enter the resolution of the content that will be displayed on the screens.
-
Edit the specific properties of the chosen mapping type.
-
Assign a piece of content to the layer in the track, and the content will be displayed on the assigned screens of the mapping in the stage and the feed output window.
Note: In the Mapping keyframe editor that will appear across the screen, move the playhead and assign multiple mappings sequentially for each layer by left clicking in the editor.
Remove mappings from your project by left clicking on the name of the mapping and dragging to the trash can icon within this menu. All mappings that are assigned to a screen or camera within the project but have been moved to the trash will appear highlighted in red.
Please note: it is useful to organise the different mappings in boxes, particularly if there are a very large number of mappings. For information on how to create, edit and organise objects within boxes, please see the section 'Organising objects in boxes' in the Object libraries sub-chapter.