Genlock
Locking to house sync can be applied through the BNC Genlock connector above the GUI port on the rear of all pro and gx range Machines.
Warning: Disguise software does not support Genlocking when VFC slot resolutions are different. All VFC slots must be the same resolution to be able to Genlock.
Disguise software supports both BlackBurst and Tri-Level Genlock signals.
There are two ways to apply Genlock: one within the Software, and the other through the Graphics Card Driver itself.
Please note: VFC cards typically add some lines of latency to output, this should be considered when configuring Genlock. This is typically around 4-8 lines, but may be up to 50 for SDI signals. Genlock is performed at the GPU level, so the outputs may be slightly out of Genlock and you may need to use an external re-synchroniser to get it back into Genlock.
Please note: We cannot determine the interlaced field from the Genlock signal, so interlaced outputs may be a full field out of sync.
Warning: When using the SDI VFC cards with an interlaced video signal there is a chance that the output signal from the VFC card will not match the field of the incoming genlock signal. To correct this state it is necessary to repeat the Apply Feed Settings process, this will re-sync the VFC card and reset which field is being output. Due to GPU genlock limitations this process may need to be repeated until the VFC card field sync matches that of the incoming genlock signal. In a multi-machine sessions this should be repeated across all machines at the same time to ensure they are locked to the same field together.
-
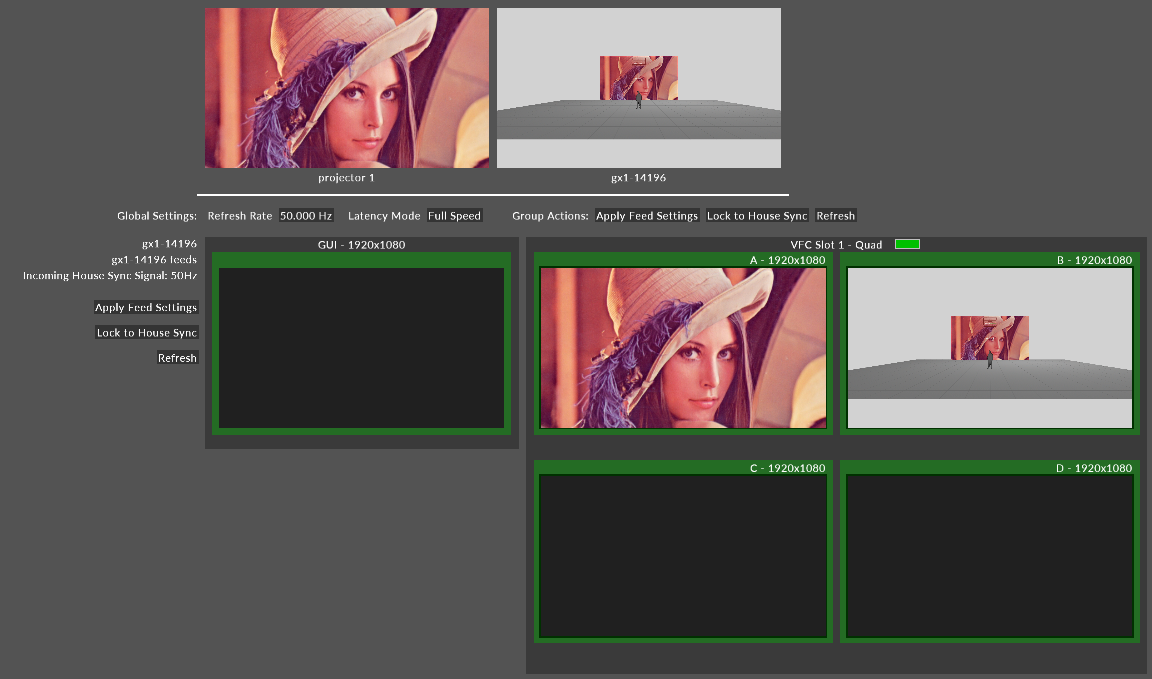
Left click on Feed in the dashboard to access the Feed View.
-
You will notice that under Apply Feed Settings there is also Lock to House Sync.
-
When pressed the machine will perform the process to then Lock to House Sync.
When locked you will see a coloured icon within each VFC card header, indicating whether that VFC card is Genlocked. If the indicator is green, this means that the machine has locked successfully.
Please note: The indicator will be blue under internal lock.

On multi-server set ups, you can apply Lock to House sync from the Director through to all of the other machines.
Genlock configuration is completed via the AMD Software: Pro Edition Control panel. For assistance with configuring Genlock, please contact disguise support.
For detailed help on the Genlock card, please see the in-built help center in the Catalyst Control Center.
To access the Catalyst Control Center to start synchronizing from an external house source please follow these steps:
-
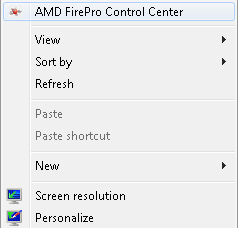
Right click on the desktop and select AMD Fire Pro Control Center
-
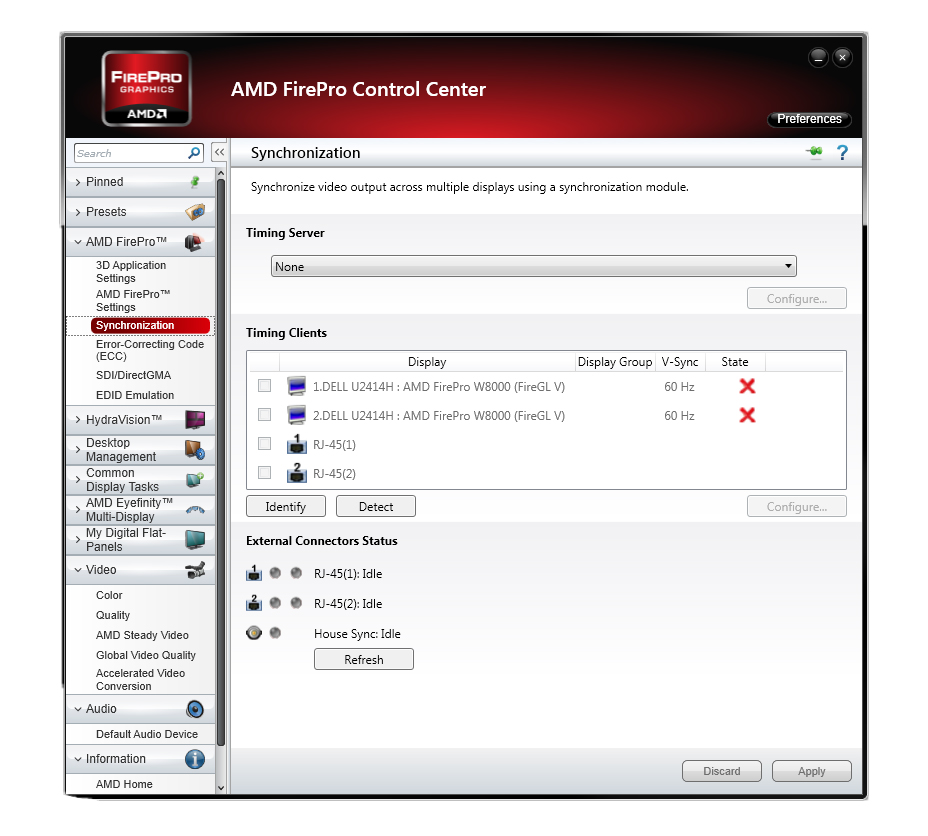
Open the AMD Fire Pro Tab and click on Synchronization
-
Click refresh under House Sync
-
Once the House Sync indicator goes Green and displays the correct Genlock signal that you are using, click on the displays (under timing clients) that you wish to lock to the Genlock source and hit apply
Your selected displays are now genlocked


-
Right click selection (top) and AMD FirePro Control Center interface (bottom)
Follow the guide below with allocated images to complete Genlock with NVIDIA.
-
Right click on the desktop and select the NVIDIA Control Panel.

-
The Synchronize displays tab should automatically open. Once on this window click on all displays that you wish to be Genlocked and ensure that the boxes are ticked below. After all displays are selected go back to highlighting your main display and select the Server Settings button.

-
The Server Settings popup will show what the current Synchronization is. Change the selection from Internal timing to external house sync' and apply the changes before pressing Ok.


Please note: Nvidia machines need to use the "Refresh" button to see the correct state.
-
When back out of Server Settings click on the View System Topology tab. Select Yes on the popup to apply the changes previously made. Once on the View System Topology window you will now see if Genlock has been completed if External Sync Signal has a green tick next to it and stating Present (In use).


To access the Catalyst Control Center to start synchronizing Internal Timing:
-
Right click on the desktop and select AMD Fire Pro Control Center.
-
Open the AMD Fire Pro Tab and click on Synchronization.
-
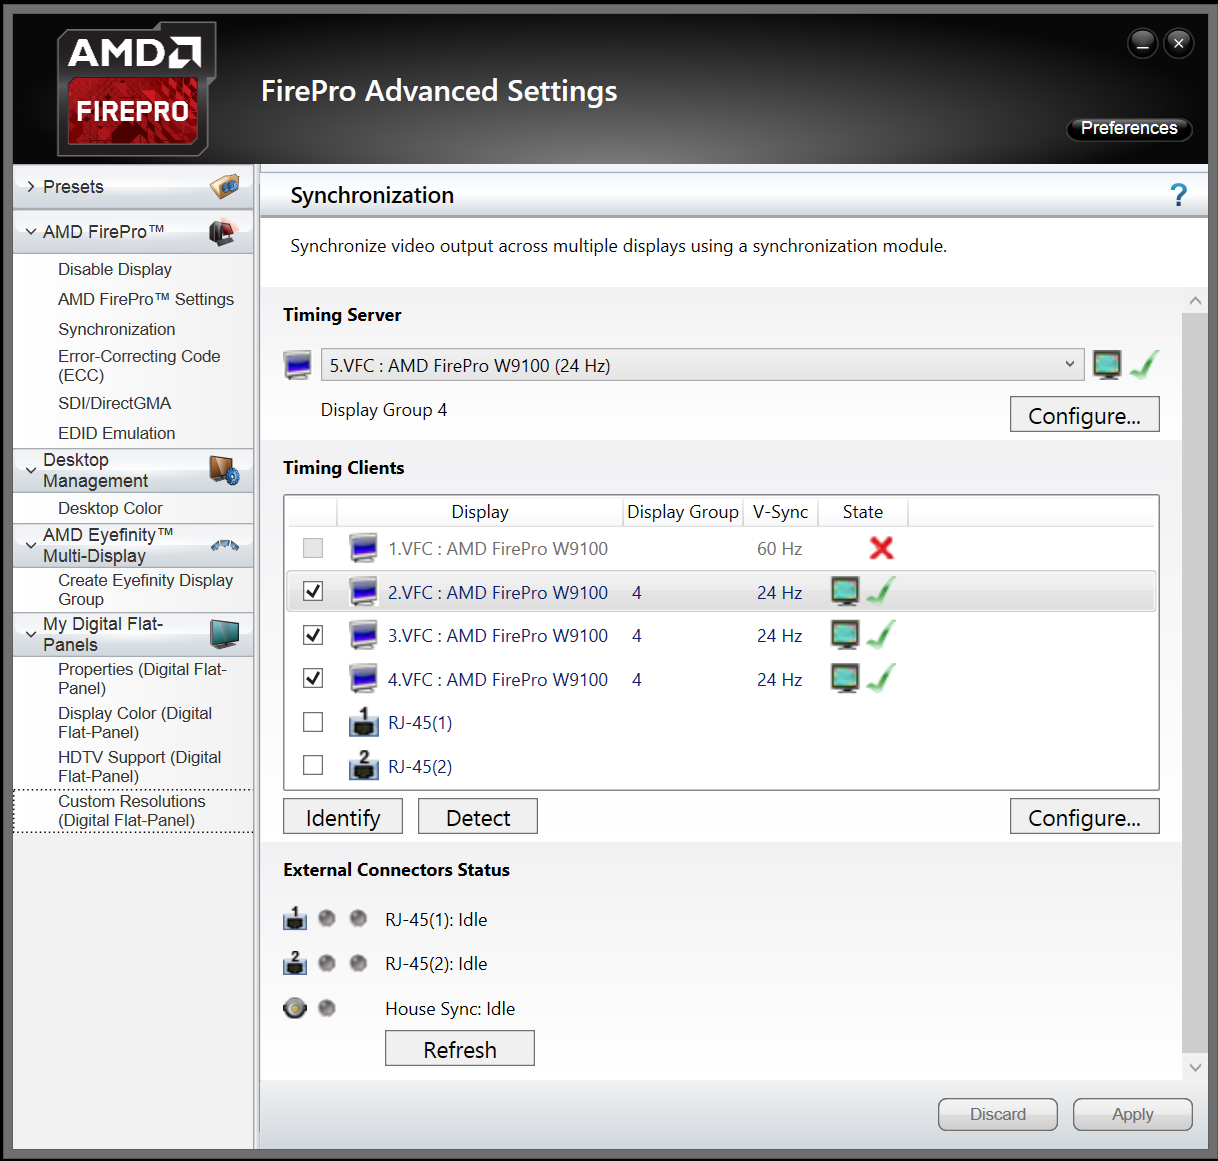
Under the Timing Server tab, select the last listed display. (For example in the image shown it was number 5)
-
Tick all screens that you wish to sync in the list below.
-
Your selected displays are now Internally genlocked.
Use the image below for reference of how the correct setup will look.
