Using drive
Set up a drive
When you create an organisation a primary drive is automatically created for you with the name of your organisation. Primary drives are indicated as such by a star icon in the Drive table in the Management area.
To add another Drive you will need to be on a paid plan.
If you want to add more drives:
-
On your Drive page, click on the + New icon and name the drive.
Alternatively, here is a second method to create a drive:
-
Click on the Drives tab if it is not the current tab.
-
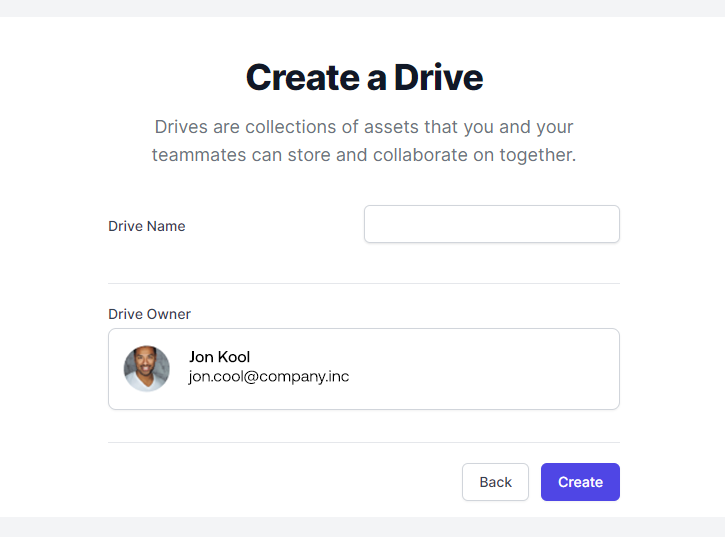
Click on the Create a Drive button.
-
Type the drive name in the Drive Name field.
-
Click on the Create button.
-
To configure your drive, click on the Update button. Or if you’d rather do this at a later stage, click on Not Now.

Rename a drive
-
To rename a drive, click on Settings in Drive Settings.
-
To change the title, click on Update, type the new name, and then click Save.
Create a folder
-
To create a folder in your drive, click on the plus icon [+] next to Folders below your drive name.
-
Type the name for your new folder in the Folder Name text field and click Create.
Rename a folder
-
To rename a folder, click on the "..." symbol below OPTIONS in the drive details view.
-
Click Rename.
-
Type the new name for your new folder in the Rename Asset field and click the Rename Asset button.
Delete a folder
-
To delete a folder, click on the "..." symbol below OPTIONS in the drive details view.
-
Click Delete.
-
Click on the Delete Asset button to confirm you want to delete the folder.